
Fenglisu, or 鳳梨酥, often translated as “pineapple shortbread” or “pineapple cake” (although it’s not really a cake) is a sweet, crumbly, buttery pastry filled with pineapple preserve of Taiwanese origin. Taiwan has been growing pineapples since the 1600s and by the Japanese era (1890-1945 in which Taiwan was part of Japan) Taiwan became one of the largest producers of pineapple in the world. Thus, it’s not surprising that Taiwanese bakers started making fenglisu. In the Taiwanese language, the word for pineapple (ong-lai) which has the same pronunciation as “prosperity comes” (ong-lai), and thus fenglisu are often given as gifts to others. Whenever we have family and friends visit from Taiwan, they often bring to us a beautifully packaged box of fenglisu (like from the famous Chia Te Bakery in Taipei), and it’s always a delight.
Recipe
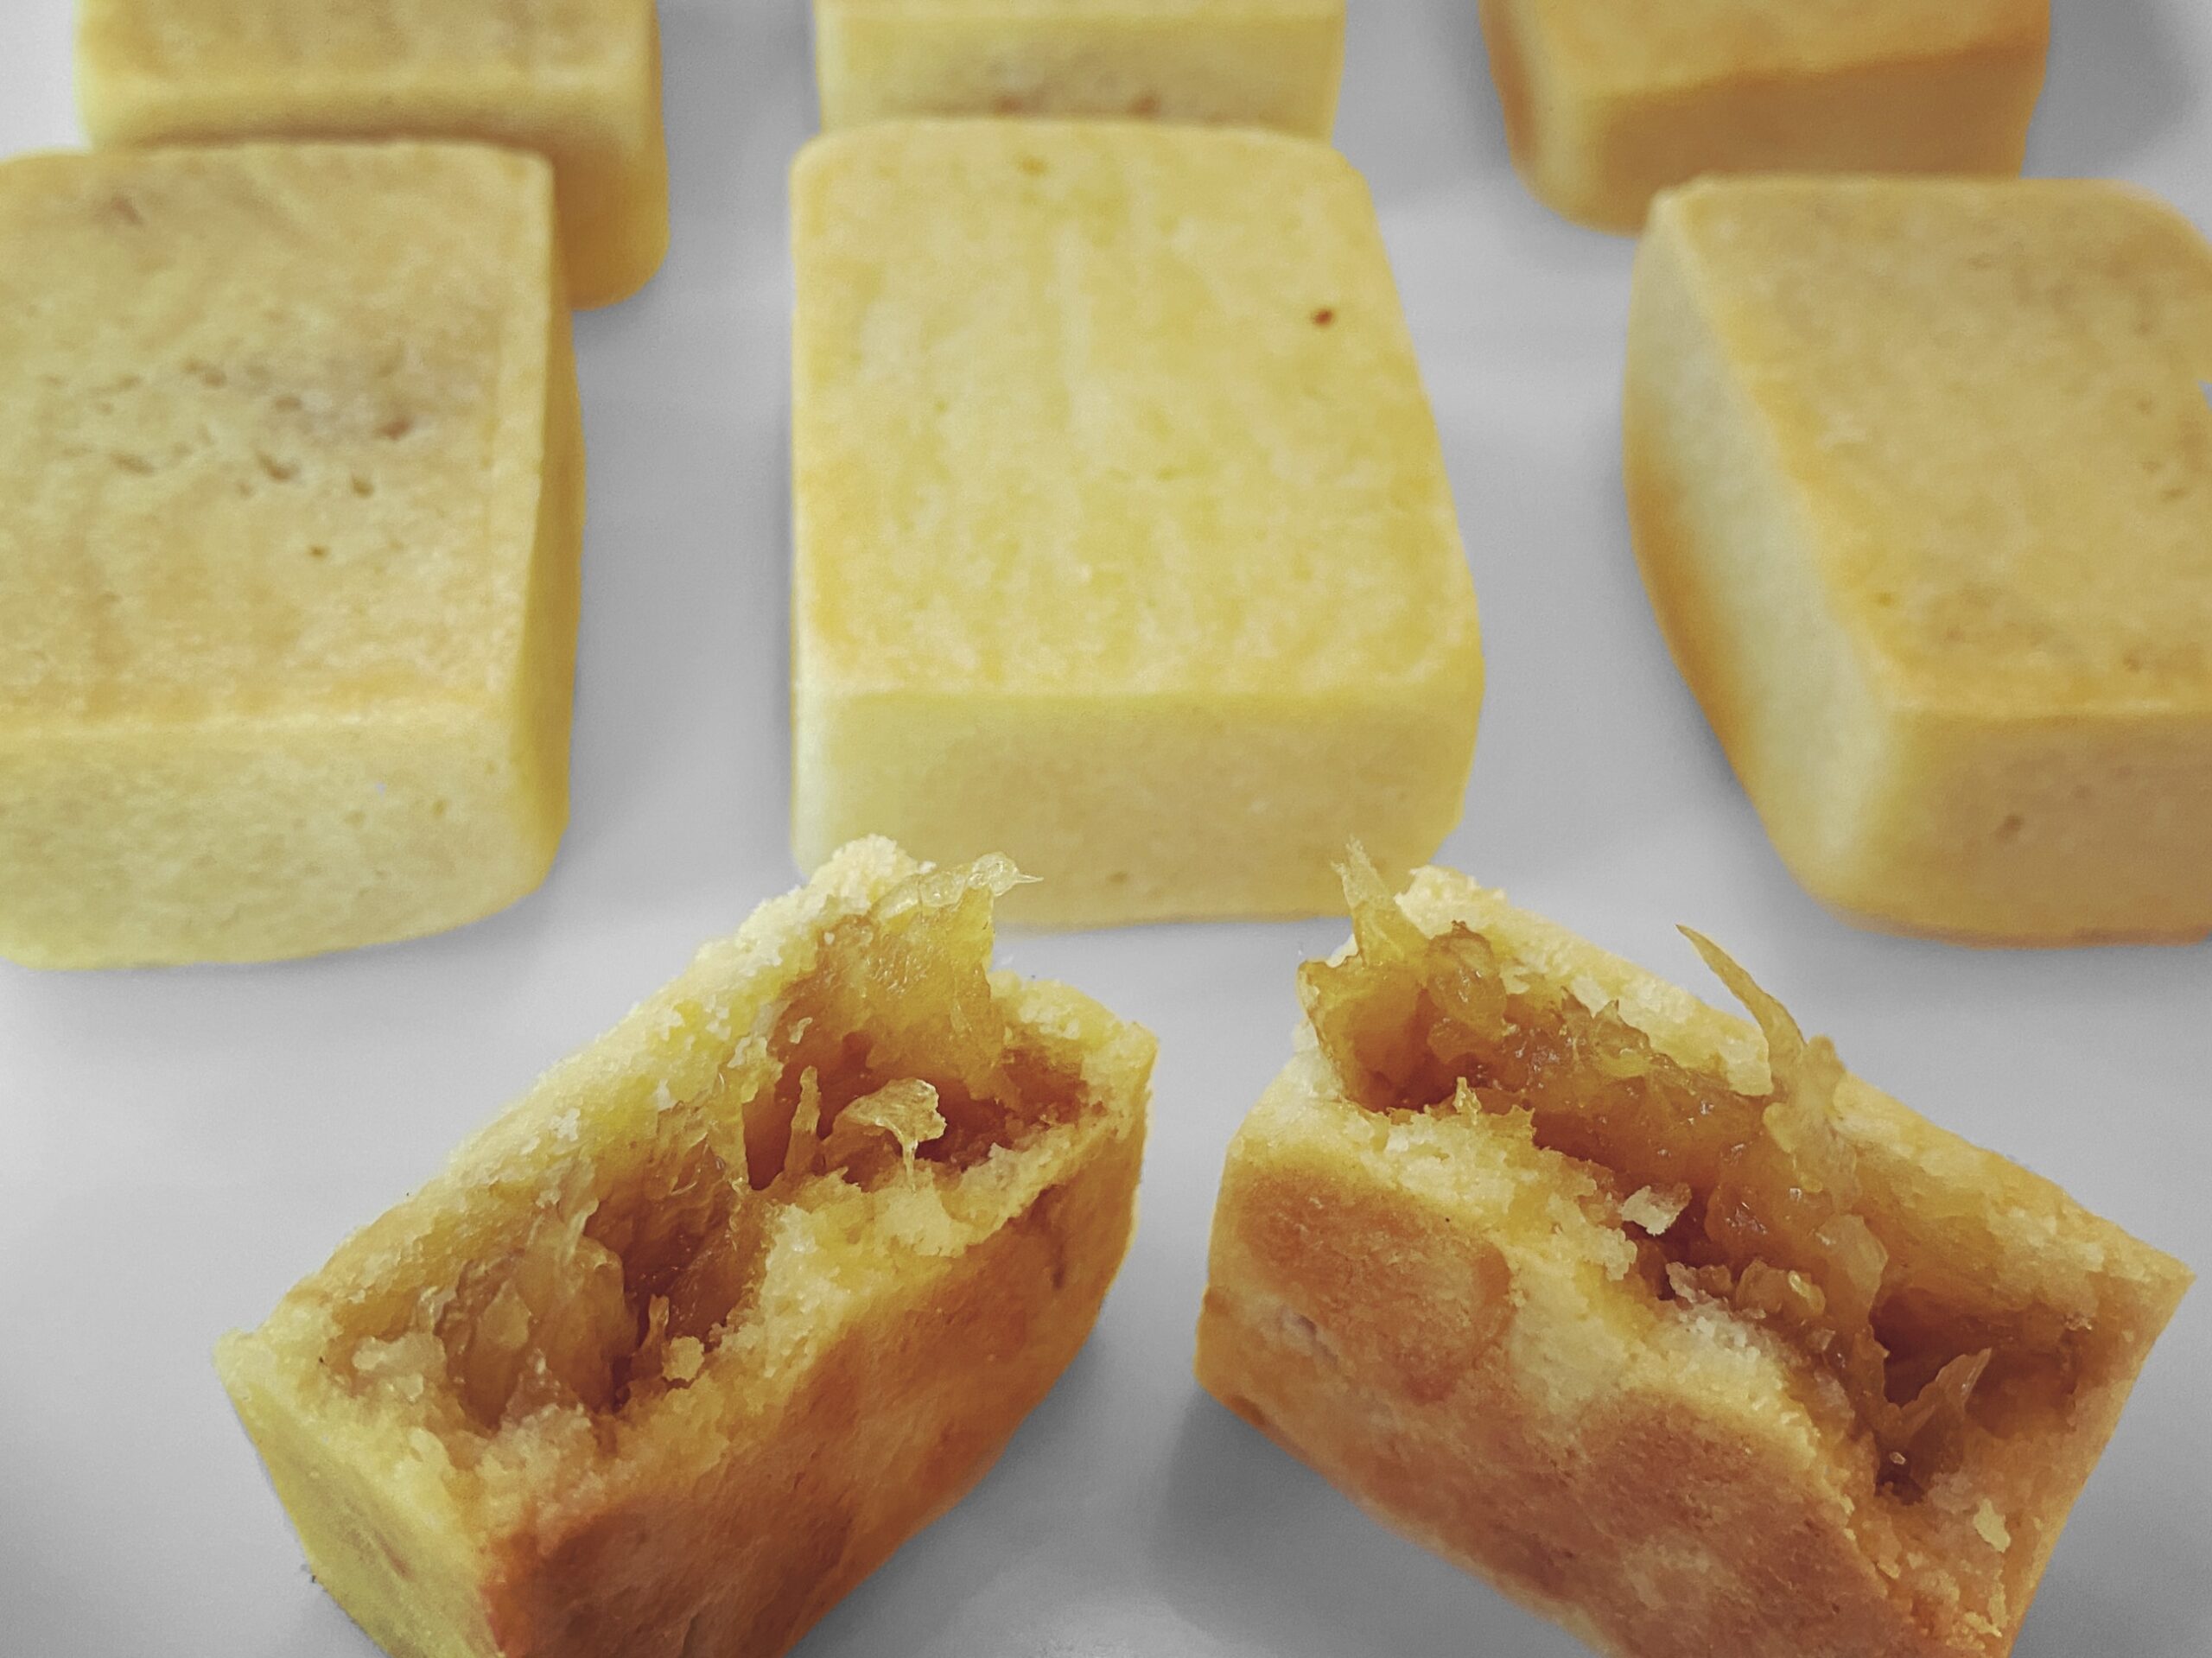
First, make the pineapple paste
- Cut up a fresh pineapple and make sure to remove the “eyes” in the pineapple so you don’t end up with sharp bits in the final paste. Blend in food processor.
- To maximize the flavor of the pineapple, do not squeeze out or discard the juice because that’s where all the flavor and sugar is. Instead, boil the pineapple in a pan to reduce it to a paste while retaining all the flavor and sugar that was in the juice.
- Traditionally, pineapple cakes contain wintermelon along with the pineapple. Adding wintermelon can give the paste more fibrous texture and more form (so it’s not just “mush”). If you want to add wintermelon, first, shred the wintermelon, then squeeze out the juice with a mesh cloth, then add it with the pineapple.
- Add sugar to taste.
- Add butter to taste.
- Optionally, if you want to make the paste more tart, you can add lemon juice or tamarind concentrate.
- Add maltose to make the paste stickier.
- Keep panfrying in pan until the paste becomes thick and doesn’t stick to the sides of the pan.
- If needed, you can add glutinous rice flour to make the paste even thicker.
- Cool in fridge.
Second, make the shortbread dough
- You’ll need 1 stick of butter, 1.25 cups cake flour, 2 egg yolks, 0.25 cups sugar, 0.25 cups milk powder, small pinch of salt. Alternatively, 5:2:1:1 of cake flour : butter : sugar : milk powder plus two egg yolks and pinch of salt.
- To make the dough airy, you’ll need to first whip the butter until it’s pale in color, then whip in the egg yolks and the sugar.
- Then, mix in the cake flour, milk powder, and salt. Mix it “just enough.” Do not overmix, otherwise gluten will form and the dough will become too thick, and the resulting crust will taste more like a stale cookie rather than shortbread.
Third, wrap and bake
- Divide the dough, form a cup with each dough piece, then place a ball of paste in it, and wrap it up.
- Place dough-paste ball in metal mold (traditionally square or rectangular), then use palm of hand to press flat into the mold. Ideally, do not overflow the mold.
- Bake for 10 minutes, flip, then bake for another 5 minutes at 350F or until golden color. Alternatively, just bake for 15 minutes without flipping.
- Take out of oven. While still hot, remove the metal molds with tongs. If you wait until the pastries are cold, then the metal mold will be difficult to remove.
- Fresh out of the oven, the crust (and paste) will be soft, and there may be some cracks. Let it cool down and the pastry will shrink a little and cracks may disappear, and the crust may become a harder, so that it would be easier to pick up without crumbling.
- For the first few hours, the crust will be a little crunchy. Let them sit for 24 hours, and the crust will become soft again, which is the desired result.